

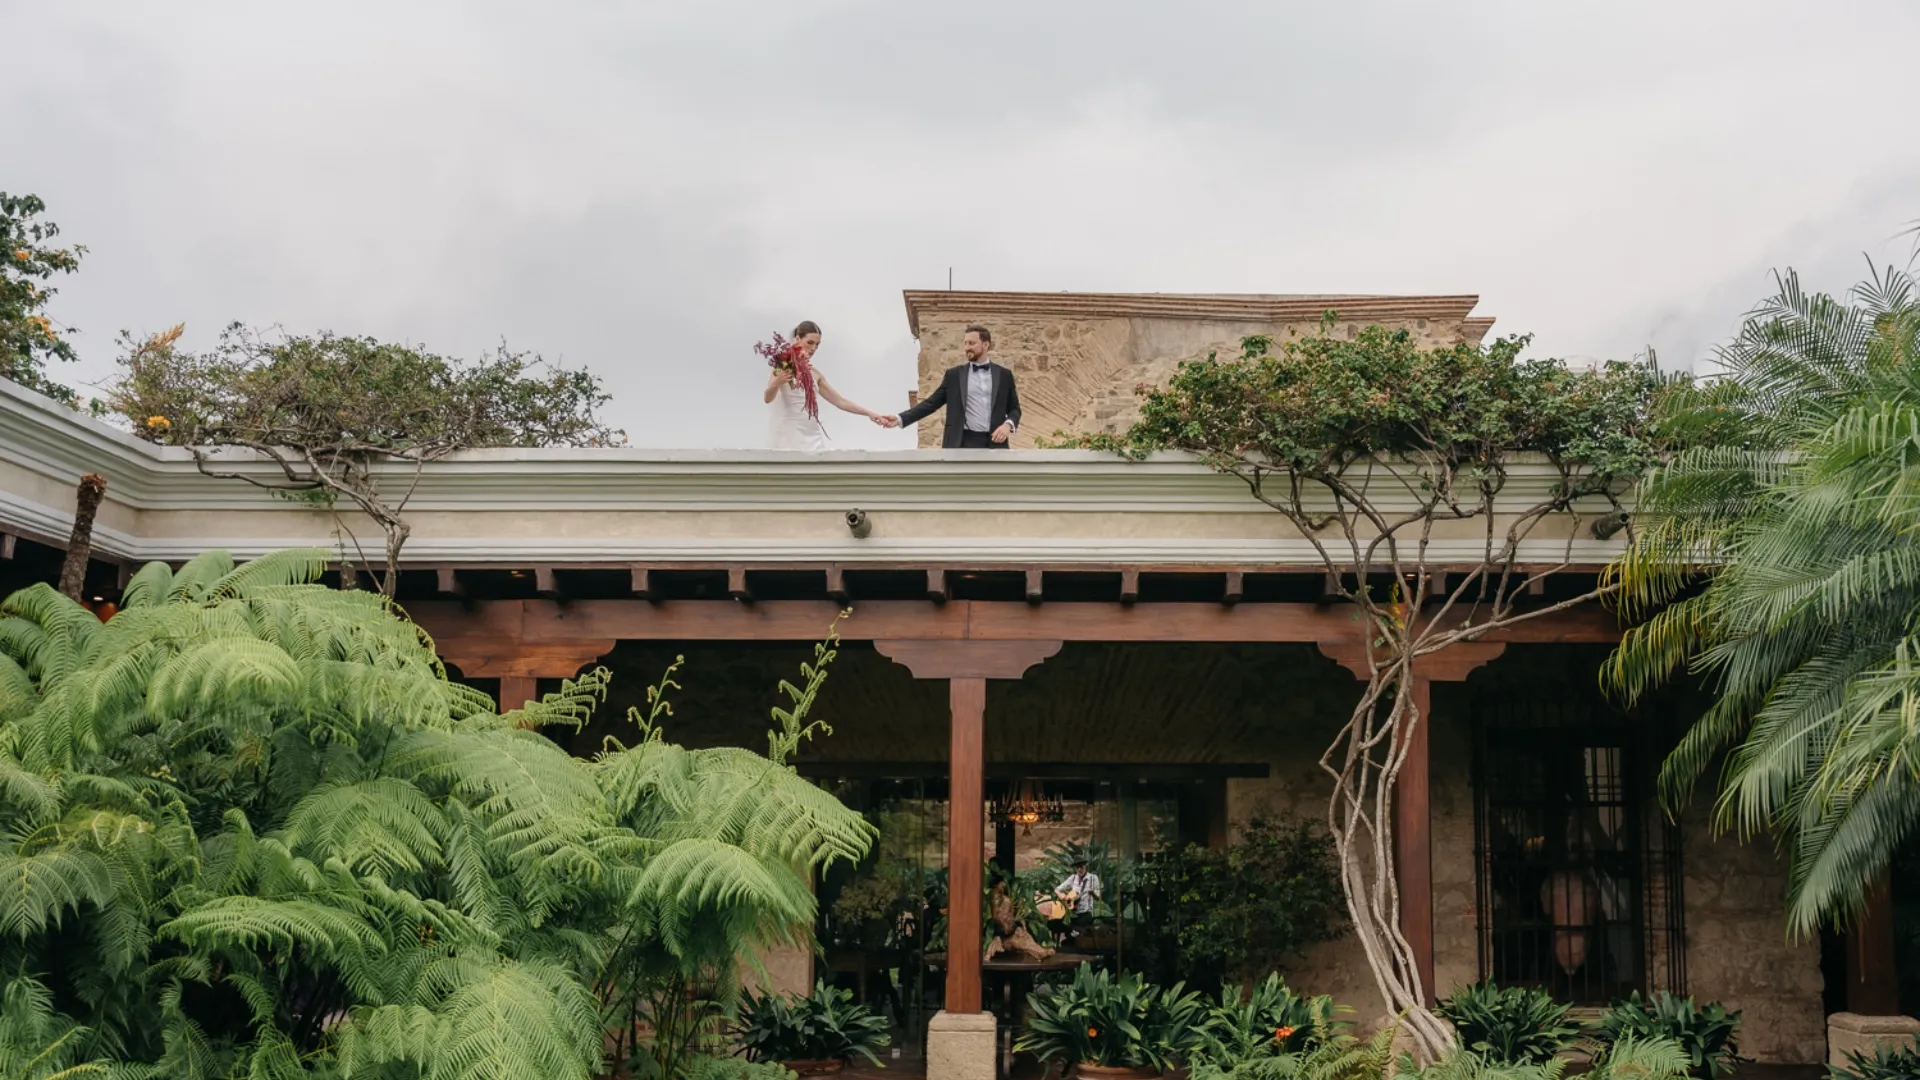
Photography by Daniel Lopez Perez


I built my wedding photography business over the last 13 years while living in Guatemala (first on Lake Atitlán, then later in Antigua).
Over time, that business grew into a reliable six-figure income. That happened because we stopped guessing and started following a simple system.
→ Jump to: The 6-Step Wedding Photography Business Roadmap
→ Jump to: Marketing Channels That Actually Work
When you’re starting a wedding photography business, you don’t need one-off advice like “do SEO” or “start a blog.”
You need a plan you can follow—one that helps you get booked, deliver consistently, and build momentum season after season.
Already confident you can shoot a wedding? Great—this guide focuses on building the business. If you’re still developing your photography skills, start with our guide on how to become a wedding photographer, then come back here when you’re ready to launch your business.
Related Wedding Photography Business Guides
Starting a wedding photography business involves more than booking your first client. These guides will help you price your work, attract the right couples, build a strong portfolio, and create a business that continues to grow over time.
| If you want to… | Start here |
|---|---|
| Price your wedding photography | How to Price Wedding Photography |
| Get your first wedding photography clients | How to Get Wedding Photography Clients |
| Book more of the right clients | How to Book More Wedding Photography Clients |
| Build a portfolio that attracts the right couples | Wedding Photography Portfolio |
| Protect your business | Wedding Photographer Insurance |
| Grow your business over the long term | Wedding Photographer Marketing |

How to Start a Wedding Photography Business
Building a successful wedding photography business doesn’t happen all at once. It happens one system at a time. In this guide, we’ll walk through the process of going from “I have the skills” to “I’m getting inquiries, booking clients, and delivering an experience that earns reviews and referrals.”Your Wedding Photography Business Roadmap
| Step | What You’ll Build | Done When… |
|---|---|---|
| Step 1: Choose Your Offer and Positioning | A clear “who you’re for + why you” message that makes your marketing and portfolio easier. | You can describe your offer in one sentence, and it wouldn’t fit every photographer in your city. |
| Step 2: Build a Portfolio That Books the Weddings You Want | Proof that feels cohesive, wedding-real, and aligned with the weddings you want to attract. | You have 10–30 strong images that tell the story of a real wedding. |
| Step 3: Set Pricing and Packages You Can Sustain | A price floor, package structure, and boundaries that keep the business viable. | You can explain your pricing confidently, and your numbers work. |
| Step 4: Create a Booking System That Turns Inquiries into Clients | A simple inquiry → consultation → contract → retainer process. | Every inquiry has a clear next step. |
| Step 5: Choose Marketing Channels That Actually Work | One primary marketing channel you can maintain consistently. | You’re consistently generating inquiries from a repeatable process. |
| Step 6: Build Your Workflow and Client Experience | A delivery process that earns trust, reviews, and referrals. | You have a repeatable workflow from booking through final delivery. |
Step 1: Choose Your Offer and Positioning
By the end of this step, you’ll know (1) whether you’re ready to build the business side now, and (2) how to describe your offer clearly enough that your portfolio, pricing, and marketing stop feeling random.
Starting a wedding photography business isn’t just making a website or posting on Instagram.
It’s building two systems:
- A booking system that brings in inquiries and turns the right couples into clients.
- A delivery system that helps you shoot and deliver weddings reliably so people trust you, reviews come in, and referrals start to happen.
The steps in this guide build both, in order.
Quick Check-In: Are You Shoot-Ready Enough to Launch?
Answer these three questions honestly:
- If I got hired for a small wedding next month, could I deliver? Not perfectly—just reliably.
- Do I have at least 10–20 images I’m proud to show a stranger? (Second shooting and styled shoots count.)
- Do I have a basic plan for the day? Timeline, family formals, and key moments.
If you answered “yes” to most of these, you’re ready to build the business side.
If you answered “no” to most of them, you’re not behind—you’re just earlier in the sequence. Start with the skills + portfolio path in our guide on becoming a wedding photographer, then come back.
Minimum Viable Beats Perfect
You don’t need a perfect website, a perfect brand voice, or a perfect portfolio.
You need a minimum viable business:
- a clear offer,
- a price floor you can sustain,
- a way to book (contract + payment),
- and one marketing channel you can run every week.
Offer Clarity Worksheet
Do this in 15 minutes:
Open a note and fill these in. This becomes the foundation for your website copy, pricing guide, and marketing.
- Where I work: [city/region + realistic travel radius]
- What I shoot: [weddings only? weddings + elopements? micro weddings?]
- My style strength: [candid/documentary, editorial/guided, film, moody, etc.]
- My experience promise: [what it feels like to work with you]
- My “not for me” boundary: [what you won’t offer or don’t want to be known for]
Who You Serve + What You’re Known For
Use this one-sentence template:
I photograph [type of couple / vibe] weddings in [location or region], focusing on [your style strength], and I’m known for [one concrete experience promise].
Examples (just to show the level of specificity):
- I photograph intimate outdoor weddings in Tennessee, focusing on candid storytelling, and I’m known for calm direction that keeps portraits quick and natural.
- I photograph city weddings with a documentary approach, focusing on real moments, and I’m known for helping couples feel relaxed even if they hate being photographed.
If your words could describe every photographer in your city, they’re not doing their job yet.
If you’re not sure what to call your style (or you’re trying to choose a lane), check out our guide on wedding photography styles.
What’s Included and What’s Not
Define your basics early:
- Coverage: hours included in your core package
- Deliverables: gallery delivery + a realistic photo count range
- Travel: what’s included locally and what triggers a travel fee
- Timeline support: how you help couples plan for good light
- Add-ons: engagement session, second shooter, rehearsal dinner coverage
Also define what you’re not offering:
- unlimited coverage,
- unlimited revisions,
- same-week full gallery delivery,
- travel without a clear policy.
Clarity prevents stress. It also makes you easier to hire.
How to Avoid the “Anything for Anyone” Trap
Pick a lane for now:
| Decision | Option A | Option B | Pick One for Now |
|---|---|---|---|
| Market | Budget | Mid / Premium | Start with a clear target, then adjust. |
| Geography | Local | Destination | Destination is easier once your systems are solid. |
| Style strength | Documentary / candid | Editorial / guided | Choose what you can deliver consistently. |
| Experience promise | Fast + efficient portraits | Slow + artful portraits | Both can work. Be honest. |
Once you choose a lane, everything else gets easier: your portfolio, your pricing, and your marketing.
One important note: this also keeps your website and content focused later. When you’re clear on “who/where/what,” it’s much easier to build pages and posts that match real searches without trying to rank one page for everything.
90-Day Execution Plan
If you want a fast, realistic way to start booking without getting overwhelmed, use this cadence:
- Days 1–7: lock your offer + a starting price floor (Step 1 + Step 3 basics).
- Weeks 2–4: build proof + a simple booking page (Step 2 + Step 4 basics).
- Weeks 4–8: pick one marketing channel and run it weekly (Step 5).
- Weeks 8–12: tighten delivery + ask for reviews/referrals (Step 6).
This isn’t about doing everything. It’s about building the minimum viable system, then improving it as you book.
How to Know You’re Ready for Step 2
You’re ready to move on when:
- You can describe who you serve and what you deliver in one clear sentence.
- You’ve chosen a “lane for now” (market, style strength, experience promise).
- You can explain what’s included and what’s not—without improvising.
If that sounds like you, the next step is building proof that matches the weddings you want.

Step 2: Build a Portfolio That Books the Weddings You Want
By the end of this step, you’ll have a small, cohesive set of images that feel wedding-real—and you’ll have one clean link you can confidently send to anyone.
Couples don’t hire you because you’re “new” or “established.”
They hire you because they trust what they see.
You don’t need a giant portfolio. You need a small portfolio that feels cohesive, honest, and wedding-real.
The Safe Path: Second Shooting, Assisting, Styled Shoots
If you want the fastest and safest path into weddings:
- Second shoot for a photographer you respect. You’ll learn pace, pressure, and problem-solving.
- Assist when you can. Watching how an experienced photographer handles a wedding day is worth a hundred YouTube videos.
- Use styled shoots strategically. They’re helpful for details and portraits, but they’re not a substitute for real storytelling.
What Couples Need to See: 10–30 Images That Do the Job
Your portfolio is not your camera roll. It’s your very best work.
A strong starter portfolio can be 10–30 images if it shows the buying signals couples care about:
- People + emotion: expressions, reactions, connection
- Story moments: ceremony, vows, reactions, speeches, first dance
- Portrait confidence: a handful of couples portraits that feel natural and well-lit
- Reception reality: at least a few low-light, movement, dance-floor frames
- Details (sparingly): enough to show taste, not enough to feel staged
This isn’t about showing everything you can do.
It’s about showing that you can deliver a real wedding.
How to Curate Fast (Without Overthinking “Cohesive”)
Use this simple filter. If an image doesn’t pass, it doesn’t go in:
- It matches the weddings I want. (venues, vibe, time of day, energy)
- It matches my current edit. (don’t mix five eras of your color)
- It helps tell the wedding story. (not just “pretty”)
- I’d be proud if this was the first image a couple saw.
A quick method that works:
- Pick an “anchor set” of 8–12 images you love (portraits + moments + reception).
- Add supporting frames to round out the story (ceremony, family, context).
- Stop at 30. More images rarely equals more trust.
Where This Portfolio Should Live So It Converts
You want one simple place on your site that does the job on a phone.
Minimum viable setup:
- One curated portfolio/gallery page (your 10–30 image set)
- One clear call to action (Contact / Inquire button that’s easy to find)
- A short line of context (where you shoot + what you’re known for)
Think of it like this: you should be able to send one clean link and feel confident it won’t confuse people.
Portfolio Mistakes That Repel Inquiries
- Inconsistent look: ten editing styles reads as uncertainty.
- Only the “pretty” stuff: if you hide ceremony and reception, couples notice.
- Leading with work you don’t want: your portfolio teaches the internet what to send you.
- Trying to look more experienced than you are: you can be new and still be professional.
A Simple Way to Build Better Proof Fast
If you don’t have enough wedding-real images yet, your goal is simple: get a few reps that produce believable proof.
Over the next month:
- Get one real-feeling wedding rep. Second shoot, assist, or photograph a small wedding where expectations are clear.
- Curate one tight set. A 10–30 image set that reads like a wedding (not random portraits).
- Publish it cleanly. Put it on your site as one clear “start here” proof link.
How to Know You’re Ready for Step 3
You’re ready to move on when:
- You have 10–30 images that feel cohesive and aligned with the weddings you want.
- Your portfolio shows more than portraits (it includes at least a bit of the wedding arc).
- You’re not leading with work you don’t want to book.
- You have one clean portfolio link you can confidently send.
Now that your proof is in place, it’s time to make sure your numbers actually work.
[Dive deeper: Read our guide on how to build your wedding photography portfolio]

Step 3: Set Pricing and Packages You Can Sustain
By the end of this step, you’ll have a defensible price floor, a simple 3-package ladder, and boundaries (retainer, overtime, turnaround) that prevent burnout.
Pricing is where a lot of new wedding businesses quietly collapse.
Not because the photographer can’t shoot.
Because the numbers don’t work—and the workload grows faster than the income.
When we were starting out, I made this classic mistake: I looked at what others charged and picked something slightly lower.
It felt strategic. But it really wasn’t.
Start With Your “Target Average Booking” (Our Calculator Makes This Easy)
Before you decide what to charge, answer this:
What does the average wedding need to bring in for your business to work?
This is the number most photographers never calculate—which is why they underprice and overbook.
The easiest way to find it is to use the calculator in our guide on how to price wedding photography.
The guide will help you calculate your target based on:
- your take-home income goal
- your real annual business costs
- tax set-aside reality
- how many weddings per year you can realistically handle
Important: this is a target average, not a rule that every package has to match. Your season can average out across base/middle/premium.
Set Your Price Floor—So You Don’t Lose Money
Your price floor is the minimum you can charge and still feel okay doing the work.
At minimum, it needs to cover:
- shooting time, editing time, and admin time
- software, insurance, website costs
- gear maintenance and replacement
- tax set-aside
- recovery cost (because wedding work is physically and mentally real)
A quick reality check:
- If one wedding takes you ~30–40 total hours, your pricing needs to reflect that total workload—not just the hours on the wedding day.
- If your “starter price” forces you to book too many weddings to hit your income goal, it’s not a starter price—it’s a burnout plan.
Build a Simple 3-Package Ladder
You don’t need 12 packages. You need 3 options that are easy to understand and choose on a phone.
Use this structure:
- Base: a real option you’re happy to shoot (not a “cheap” package you secretly hate).
- Most Popular: the package you want to book most often (this should feel like your default).
- Premium: a true upgrade for couples who want more coverage/support.
If you want a simple place to anchor your ladder, many photographers anchor around coverage time:
- Base: 6 hours
- Most Popular: 8 hours
- Premium: 10 hours
Your ladder is doing two jobs:
- help couples self-select quickly
- help your bookings cluster around your target average booking
What Should Actually Change Between Packages
The strongest packages change a few high-impact levers (not a bunch of filler).
These are the levers that tend to matter most:
- Coverage time (with a clear overtime policy)
- Support (second shooter when timelines/logistics get complex)
- Deliverables (album/print credit at the top tier, if you can deliver it consistently)
- Flexibility (a short session on a different day can be a clean upgrade without making every wedding day longer)
Use a Private “Hourly Equivalent” to Protect Yourself
Even if you sell packages publicly, do this check privately:
Hourly equivalent = package price ÷ (coverage hours + editing/admin hours)
If the result makes you uncomfortable, you don’t have a confidence problem—you have a pricing problem.
This is one of the simplest ways to prevent undercharging while still keeping your public pricing clean and package-based.
Retainers and Boundaries (These Prevent Burnout More Than Price Does)
Two things are non-negotiable:
- a signed contract
- a non-refundable retainer to secure the date
Pricing without boundaries is how “just one more thing” becomes your whole season.
These boundaries will protect your time:
- Overtime: what happens if the day runs long (rate + how it’s approved)
- Travel: what’s included vs. what’s extra
- Turnaround: a realistic delivery window you can consistently meet
How to Know You’re Ready for Step 4
You’re ready to move on when:
- You have a target average booking (even if you’re not fully there yet).
- You know your price floor and can explain it without apologizing.
- You have 3 packages you can recommend confidently.
- You have contract + retainer + basic boundaries in place.
Now we make it easy for the right couples to hire you.
Step 4: Create a Booking System That Turns Inquiries Into Clients
By the end of this step, you’ll have a repeatable inquiry → booked process that feels professional, sets expectations early, and prevents leads from slipping through the cracks.
At this point, you have:
- a clear offer,
- a curated portfolio,
- pricing that makes sense.
Now we make it easy to hire you.
The Big Idea: Your Booking System Has One Job
A booking system isn’t about sounding “salesy.”
It’s about removing uncertainty.
Couples don’t book when they’re confused about:
- what happens next,
- what it costs (even roughly),
- how you work,
- or whether you’re actually available and professional.
Your job is to create a flow that feels calm, clear, and guided—every single time.
The Simplest Inquiry → Booked Flow
This is the baseline flow that works in almost every market:
- Inquiry comes in. You capture it in one place (email/CRM/spreadsheet) so it doesn’t disappear.
- Fast response. Same day if possible. (Speed is a competitive advantage.)
- Set expectations. Confirm availability + share pricing context + offer one clear next step.
- Consult call (or structured email exchange). You build confidence and recommend the right package.
- Send contract + invoice. Retainer secures the date.
- Pre-wedding confirmation. Timeline, family groupings, and delivery expectations are locked.
[Want to try paid ads? Here’s our 6-step system for running wedding photography ads.]
The Two Places Leads Fall Apart (Fix These First)
Most photographers lose couples in one of these two moments:
- Right after the inquiry. Slow response, vague reply, no next step.
- Right after pricing is shared. No context, no recommendation, no follow-up plan.
If you fix these two points, you’ll usually see a noticeable increase in bookings, without changing anything in your marketing strategy.
Your “Fast Response” Template—Copy/Paste Template
Your reply should do three things:
- Confirm availability. (Or tell them the date is unavailable quickly.)
- Set pricing expectations. A starting price, typical range, or “most couples invest…”
- Give one clear next step. A consult link or “reply with two times that work.”
Here’s a simple structure:
- Warm opener: “Thanks so much for reaching out—your day sounds amazing.”
- Availability: “I’m available on [date].”
- Pricing context: “Wedding coverage starts at $X (most couples invest $Y–$Z depending on hours/add-ons).”
- Next step: “If that range feels aligned, here’s my link to book a 15-minute call.”
The point is not perfection, it’s consistency.
Consult Calls: What to Cover
You don’t need a long sales script. You need a calm structure.
A simple consult flow:
- Ask a few questions. What matters most? What are they excited about? Any stress points?
- Explain your process. What it’s like to work with you from booking → delivery.
- Recommend a package. Don’t make them guess. (“Based on what you shared, I’d recommend…”)
- Close with a clear next step. “I’ll send the contract + invoice—your date is secured when the retainer is paid.”
If you hate calls, you can do a structured email exchange—but it still needs:
- pricing context
- a recommendation
- a clear “here’s how you book” step
Contract + Retainer = Real Booking
A date is booked when the contract is signed and the retainer is paid.
Everything else is a “maybe.”
→ Get help building your wedding photography contract—includes a custom GPT to help you draft fast
How to Reduce Ghosting After Sharing Prices
A lot of couples go quiet after pricing for normal reasons:
- they’re comparing options
- they’re waiting on family input
- they’re overwhelmed with planning
Your job is to make the next step easy, and follow up once (calmly).
A simple follow-up framework:
- Day 2–3: “Happy to answer questions—most couples choose [package] for [reason].”
- Optional soft deadline: “I can only hold dates for a short window—if you’d like to move forward, I can send the contract today.”
One helpful follow-up beats three awkward ones.
Set Expectations Before the Wedding
Before the wedding:
- confirm the timeline,
- confirm family groupings,
- confirm delivery timing.
A structured questionnaire makes this dramatically easier.
→ Here’s my guidance on wedding questionnaires, including the exact questionnaire I use with clients.
How to Know You’re Ready for Step 5
You’re ready to move on when:
- You have a defined process from inquiry → consult → contract → retainer.
- You have a clear definition of “booked.”
- You respond the same day (or have a system that makes this realistic).
- You can explain your next step in one sentence.
Once your booking system is stable, marketing becomes simpler—because you can actually handle the leads you generate.

Step 5: Choose Marketing Channels That Actually Work for Wedding Photographers
By the end of this step, you’ll choose one primary marketing channel you can run weekly—and you’ll know what “consistency” actually looks like (with a simple 90-day cadence).
You don’t need to be everywhere.
You need to be consistent somewhere.
Quick Finder: Which Marketing Guide Do You Need?
Use this if you’re stuck deciding what to focus on first.
| If you’re trying to… | Start here | Why |
|---|---|---|
| Get more inquiries (you’re not getting contacted consistently) | How to Get Wedding Photography Clients | A visibility + trust first plan (with a realistic 30–90 day action roadmap). |
| Turn inquiries into bookings (you’re getting leads, but they’re not converting) | How to Book More Wedding Photography Clients | A conversion-first system (inquiry → consult → follow-up → booked). |
Start With Website Fundamentals
These are best practices to do so all channels convert better.
Before you “pick a marketing channel,” make sure your website can convert attention into inquiries.
At minimum, your site should have:
- a clear portfolio (not a random dump),
- a human About section (your approach + what it feels like to work with you),
- pricing context (enough to pre-qualify, not necessarily every detail),
- a simple contact form (that works on mobile),
- clear next steps (what happens after someone inquires).
If you don’t have this foundation, even the “best” marketing channel won’t feel like it’s working—because you’ll be leaking leads.
Pick One Primary Channel for 90 Days
Most photographers fail at marketing because they switch too often.
Pick one channel you can actually run weekly for 90 days:
- Local SEO (fastest path to inquiries in many markets)
- Vendor relationships (highest-trust leads when it clicks)
- SEO + blogging (the compounding channel)
- Social media (best as proof + validation, not your only engine)
Your rule: one primary channel + one “maintenance” channel.
- Primary channel: the one you intentionally run every week.
- Maintenance channel: keep your website updated, respond fast, and share occasional proof so you don’t look inactive.
SEO and Blogging: The Compounding Channel (The Version That Actually Works)
SEO compounds when your site sends clean signals and you publish pages that match how couples search.
Here’s the high-leverage, high-level approach that aligns with those guides:
- Use “one page, one primary intent.” Don’t make your homepage, wedding services page, and pricing page all target the same keyword intent. Clarity beats coverage.
- Start with local foundation first. Clear location + offer on core pages, a solid Google Business Profile, and a review habit. This is where most photographers see the fastest lift.
- Publish proof pages that match real searches. Real wedding posts and venue-focused pages tend to align with how couples search and convert well when done honestly.
- Use internal links to reinforce the map. Venue posts and guides should naturally link back to your wedding services page (and your contact page if it fits). This helps Google and helps couples.
A simple weekly cadence (do this for 90 days):
- Week A: publish one proof page (a real wedding post or a venue-focused page you can support with real work)
- Week B: improve one core page for clarity (homepage, wedding services page, pricing page) using the “one page, one primary intent” rule
- Every week: ask for one review (or follow up on a review request you already sent)
Keep the goal simple: clean intent + proof + consistency.
Local SEO Basics (Often the Fastest Path to Inquiries)
If you’re trying to book weddings in a specific place, local SEO is often the quickest way to start getting inquiries.
That’s because couples search by location long before they search by photographer name.
Here’s the high-leverage version:
- Create (or clean up) your Google Business Profile. Use your real business name, choose the right category, add service areas, and upload a tight set of recent portfolio images.
- Make location clarity obvious on your core pages. Your homepage, wedding services page, and contact page should clearly communicate where you shoot (without keyword-stuffing).
- Build 2–3 “trust pages,” not 30 thin pages. A service area page, a venues hub, and one strong venue page are often enough to start.
- Collect reviews early and consistently. Reviews are a ranking factor and a conversion factor. Build it into your workflow (gallery delivery is the easiest trigger).
Vendor Relationships: The Underrated Accelerator
Planners and venues can send consistent work—especially when you become the photographer they trust under pressure.
The basics matter:
- deliver on time,
- share vendor credits generously,
- provide images vendors can actually use,
- stay calm and professional on wedding days.
A simple weekly cadence (do this for 90 days):
- Pick 10 local vendors you respect (planners, venues, coordinators, florists).
- Once per week: send one thoughtful relationship email/message (not a “send me referrals” ask).
- After weddings: share a small set of vendor images and tag/credit them. Make it easy for them to use your work.
Vendor relationships aren’t a hack. They’re compounding trust.
Social Media
Social media can work for getting clients, but it’s honestly not the strongest channel for bookings.
For most wedding photographers, social media is strongest as:
- validation: couples check your Instagram after finding you elsewhere,
- proof: consistent real wedding work signals you’re active and credible,
- connection: it keeps you top of mind for referrals and vendor peers.
If social is your primary channel, keep it simple:
- post proof from real weddings (not just aesthetic fragments),
- make it obvious where you shoot and how to inquire,
- pick a pace you can sustain weekly.
How to Know You’re Ready for Step 6
You’re ready to move on when:
- You’ve chosen one channel you can run weekly for 90 days.
- You’re tracking inquiries (even with a simple note or spreadsheet).
- Your core pages have clear “jobs” (so you aren’t competing with yourself).
- You’re improving one thing at a time instead of switching channels constantly.
Next we make delivery boring and consistent—in the best way.
Step 6: Build Your Wedding Workflow and Client Experience
By the end of this step, you’ll have a repeatable “pre-wedding → wedding day → delivery” workflow you can run every time—so your client experience is consistent, your editing load stays controlled, and reviews/referrals can actually compound.
This is where your business becomes sustainable.
Couples remember your photos, but they also remember how you made them feel. That feeling drives reviews and referrals.
Minimum Viable Wedding Workflow (Steal This)
If you want couples (and vendors) to trust you—and to recommend you—you need a workflow that’s boring and consistent.
Here’s the minimum viable version:
- Timeline confirmation: confirm final timeline 2–4 weeks out.
- Family formals plan: collect groupings in advance and assign one helper to wrangle people.
- Backup system: redundant cards/batteries on the day, and two backups immediately afterward.
- Sneak peek policy: define what “sneak peeks” means (quantity + timing) before anyone asks.
- Gallery delivery promise: one clear delivery window you can hit consistently.
If you do nothing else, do these five things. They prevent chaos and protect your reputation.
Phase 1: Before the Wedding—Reduce Chaos Before It Starts
Your job is to remove uncertainty for the couple and remove surprise-work for you.
- Confirm the timeline 2–4 weeks out. Look specifically for ceremony time vs. light, travel gaps, and whether portraits are realistic.
- Collect family formals in advance. Ask for groupings by name (not “mom’s side”) and ask who’s divorced/not speaking so you don’t walk into landmines.
- Set expectations in writing. Confirm arrival time, coverage end time, and how overtime works.
- Lock the delivery expectations. “Sneak peeks by X,” “full gallery by Y,” and the delivery method.
Simple template you can copy into email:
- “I’ll confirm your final timeline about 3 weeks out.”
- “Please send family formals groupings by [date]. I recommend choosing one family member who can help gather people quickly.”
- “Sneak peeks: [X images] within [Y days]. Full gallery: within [Z weeks].”
Phase 2: Wedding Day—Professional = Calm + Clear + Fast
Most couples don’t remember your camera settings. They remember whether you felt in control.
- Show up early enough to breathe. Even 15 extra minutes changes your energy and the couple feels it.
- Run family formals like a system. Use the pre-collected list, call names, shoot fast, move on.
- Protect the couple’s experience. If something goes wrong, your job is to keep them from feeling it.
- Vendor kindness pays off. Introduce yourself to the planner/coordinator, ask what they need, and share space smoothly. This is referral fuel.
Phase 3: After the Wedding—Delivery Is Where Referrals Are Made
Consistency here is what turns “great photos” into “we can’t stop recommending you.”
- Same-night or next-day backup routine: two backups minimum (one local + one cloud/offsite). Don’t “get to it later.”
- Cull with a time boundary: decide your approach so you don’t spend 12 hours debating near-duplicates.
- Edit with a repeatable baseline: consistent color/skin first, then creative touches. Consistency beats perfection.
- Deliver exactly how you promised. If you under-promise and over-deliver, great. But never miss your stated timeline.
Set Your Delivery Expectations
Doing this shapes your reputation.
Before the wedding, tell couples:
- when they’ll get sneak peeks,
- when they’ll get the full gallery,
- how they’ll receive and download images,
- how albums/prints work (if you offer them).
Then meet that timeline. Reliability is a marketing channel.
Build a “Reviews + Referrals” Loop So Great Work Compounds
Don’t leave this to chance.
- At gallery delivery: include a short “thank you + what’s next” message and one clean review link (don’t overwhelm them with five asks).
- Make referrals easy: “If you have a friend getting married, I’d love an introduction—just forward this email.”
- Vendor follow-up: send a small set of vendor images within a week or two and credit them. Vendors remember who makes their job easier.
How to Know You’ve Completed Step 6
You’ve built the foundation when:
- You have a written workflow for: timeline confirmation, family formals, backups, sneak peeks, full gallery delivery.
- Your delivery timelines are realistic—and you consistently hit them.
- You have a repeatable “review request” and “vendor follow-up” built into delivery.
- Your post-wedding process protects your energy (so you don’t burn out mid-season).
Congratulations!
You now have the core systems of a wedding photography business.
You know how to define your offer, show proof, price your work, book clients, market consistently, and deliver weddings in a way that earns trust.
From here, your job isn’t to reinvent everything.
It’s to keep running the system—booking weddings, delivering them well, and improving one piece at a time.
That’s how small photography businesses quietly turn into stable ones.

Legal, Admin, and Gear
This is where a lot of photographers get stuck.
They research business structures and buy gear to feel more legitimate, while avoiding the work of booking.
The goal of this section is simple: get legally covered, administratively functional, and operationally ready—without turning it into a six-month project.
Legal and Business Basics
Before you book your first paid wedding, make sure you have:
- a basic business structure (sole prop is fine for many beginners; an LLC can make sense as you grow)
- a way to take payments (invoice + card/bank options)
- liability coverage (at least general liability; gear coverage is a bonus)
- a real contract (not a “template you found on Google” that you never read)
If you want the full legal checklist (business structure, permits, taxes, insurance, contracts, and what to do in what order), check out our guide on how to start a photography business legally.
Admin Systems That Keep You From Dropping Leads
You don’t need fancy software. You need a simple system you’ll actually use.
At minimum, have:
- one inbox you check daily (and a saved “first response” template)
- a lead tracker (spreadsheet, Notes app, or a basic CRM—anything that prevents ghosting)
- a quote → contract → invoice flow (so every booking is repeatable)
- a file organization habit (one consistent folder structure for every wedding)
A simple rule: if a couple inquires today, you should know exactly what happens next—without thinking.
Money and Taxes (Keep It Simple, Keep It Real)
You don’t need perfect bookkeeping to start, but you do need two things:
- separate business tracking (a separate bank account is ideal, but even a dedicated card + clean spreadsheet works early on)
- a tax set-aside habit (automate it if possible)
If you want help making your pricing support your costs and tax reality, our pricing guide includes a calculator you can use to set a sustainable baseline.
Minimum Viable Wedding Gear
At minimum:
- two camera bodies (or a primary + a true backup)
- a fast standard lens (the workhorse)
- a telephoto option (ceremony, candids, compression)
- a reliable flash (receptions happen whether you’re ready or not)
- extra batteries and cards (and a plan to not run out)
Want the full list and a few practical kits you can copy? Check out our guide to wedding photography gear.
These could also be helpful:
The Point of This Step
You’re done here when:
- you can take payment cleanly,
- your contract and insurance protect you,
- you have a simple admin workflow you won’t drop,
- and you can show up to a wedding with real backups.
Then stop researching—and go book.

When to Raise Prices and What to Do Next
A wedding photography business doesn’t explode overnight. It compounds.
Raising prices is part of that compounding—but it should be driven by signals, not vibes.
Signs It’s Time to Raise Your Prices
If you’re seeing two or more of these consistently, you likely have room to raise:
- You’re booking “too easily.” Couples say yes quickly and price rarely becomes the main objection.
- Your ideal months are filling early. You’re hitting 50–75% capacity for peak dates faster than expected.
- Your booking rate is healthy. Inquiries are turning into consults and contracts at a steady clip.
- You feel stretched at your current rate. You’re busy, editing is piling up, and the money doesn’t match the load.
How to Raise Prices Without Spooking Yourself
Don’t double your rates overnight. Raise in steps and watch what happens.
Here’s the simple method:
- Choose a standard increase amount. (A small step you can repeat.)
- Apply it to new inquiries only. Honor existing quotes for a defined window.
- Watch your booking rate for a real sample. Give it 4–8 weeks or a meaningful number of inquiries.
- If bookings stay healthy, keep it. If bookings drop sharply, adjust your offer/lead quality before you panic and discount.
Capacity Pricing: The Cleanest Way to Raise
One of the safest ways to raise is to tie it to capacity.
When a month is filling beyond what you can handle sustainably, the next wedding in that month should cost more.
A simple rule:
- At ~50% capacity: small increase.
- At ~75% capacity: another step up.
- At ~90% capacity: raise again or close the month.
This isn’t “being greedy.” It’s protecting your energy and preventing a fully booked season at prices you’ve already outgrown.
What to Improve Instead of Adding More Services
Most photographers don’t need five new offerings. They need a tighter system.
If you want to grow without chaos, focus on refinement:
- Improve your lead quality (better venues, better referrals, better search intent).
- Tighten your offer clarity (simpler packages, clearer deliverables, fewer question marks).
- Speed up your workflow (faster cull/edit process, clearer delivery timelines).
- Strengthen vendor relationships (vendor-friendly delivery and easy-to-share images).
Your Next Best Move
Use this as a simple diagnosis:
- If you’re not booking: tighten your offer and commit to one marketing channel for 90 days (don’t channel-hop).
- If you’re getting inquiries but not bookings: fix conversion—response speed, consult flow, and follow-up.
- If you’re booked but exhausted: raise prices in steps, simplify deliverables, and protect peak-season capacity.
If you follow the steps in this guide—clearly, calmly, and consistently—you’ll build something stable.
And stable beats flashy every time.
FAQ: Starting a Wedding Photography Business
Here are some of the questions I see come up a lot around getting a wedding photography business started.
Can you start a wedding photography business with no experience?
Yes, but it’s risky to start by leading weddings immediately. The better path is to build proof and reps first (second shooting, assisting, styled shoots used strategically), then launch the business side once you’re confident you can deliver consistently. If you’re not shoot-ready yet, start with how to become a wedding photographer.
How much money do you need to start a wedding photography business?
You can start lean if you already have a camera and one solid lens, but don’t ignore the real minimums: backups, insurance, and a contract. Many new photographers over-spend on gear and under-invest in systems (booking flow, pricing floor, and a simple website). Start minimum-viable, then upgrade as you book.
Do you need a business license or LLC to start?
It depends on where you live, but you typically need some combination of registration, basic accounting, and a contract before taking paid work. You do not need a complicated structure on day one. Get legal enough to operate, protect yourself with insurance and a real contract, and avoid spending months “setting up” instead of booking.
What should your first wedding photography packages look like?
Keep it simple: 2–3 packages with clear differences (coverage time, second shooter, engagement session, or album credit). Most beginners do better with fewer options and stronger guidance. The goal is to make it easy for couples to choose and easy for you to deliver. When you’re first getting started, avoid over-complicating things with add-ons like videography or wedding content creation.
How do you know what to charge when you’re new?
Start with a price floor based on time and costs, then choose a package structure you can sustain. Avoid pricing purely by what others charge. If you want the full framework (including a defensible baseline and a way to raise prices), use how to price wedding photography.
How do you get your first wedding photography clients?
Pick one primary channel and run it weekly:
- Vendor relationships: planners/venues, delivered consistently over time
- Local SEO + venue pages: the compounding discovery channel for your area
- Social proof: consistent posting plus clear inquiry CTA
Most people fail because they try to do all three at once and do none consistently.
What’s the fastest marketing channel for beginners?
Often: local SEO + vendor relationships. Local SEO can generate inquiries while you build long-term SEO content, and vendor relationships can become a steady referral engine once you’re delivering well.
Do you need a website, or is Instagram enough?
Instagram can help, but a website is usually what turns interest into inquiries. Couples want a home base where they can see a cohesive portfolio, understand what you offer, and contact you. A simple, clean site beats a complex one that never launches.
What’s the most important system to set up early?
Your inquiry-to-booking system (response, consult flow, package recommendation, contract + retainer). If this is messy, you can get inquiries and still fail to book.
When should you raise your prices?
When your calendar starts filling faster than expected, couples say yes without heavy pushback, and you feel stretched at your current rate. You don’t need huge jumps—small increases compound, especially when your workflow and marketing get tighter.



 Español