

Want to become a wedding photographer? You’re in the right place.
I’ve been photographing weddings for almost 15 years, and I’ve shot more than 300 weddings during that time.
My work has been featured in The New York Times, Vogue, and HuffPost, and I’ve built a wedding photography business that earns six figures a year.
It took a long time to get here. But the payoff has been huge.
→ Jump to: The 6-Step Wedding Photographer Roadmap
→ Jump to: How to Build Real Wedding Experience Safely
Becoming a wedding photographer takes more than learning how to use a camera.
You need to understand how weddings move, build skills that hold up under pressure, learn how to direct real people, and get enough experience that you’re not improvising when the important moments happen.
Already confident you can photograph a wedding? Great—this guide focuses on developing the craft and gaining real experience. If what you need now is pricing, marketing, insurance, and booking systems, head over to our guide on how to start a wedding photography business.
Resources to Help You Build Your Wedding Photography Skills
Becoming a wedding photographer means learning the craft, understanding the wedding day, directing people confidently, and knowing when you’re ready to take on paid work. These guides will help you build those skills one layer at a time.
| If you want to… | Start here |
|---|---|
| Understand how a wedding day actually unfolds | Wedding Photography Timeline |
| Build the practical skills weddings demand | Wedding Photography Tips |
| Direct couples and groups more confidently | Wedding Photo Poses |
| Create natural interactions instead of stiff poses | Wedding Photo Prompts |
| Choose a wedding-capable camera and lens kit | Wedding Photography Gear |
| Turn your skills into a real business | How to Start a Wedding Photography Business |
How to Become a Wedding Photographer
Becoming a wedding photographer doesn’t happen all at once. It happens one layer at a time. You learn how weddings flow. You build technical skills that hold up under pressure. You practice directing people. Then you gain real experience gradually, before taking responsibility for an entire wedding day. This guide will take you from deciding whether wedding photography is right for you to photographing your first wedding with a clear plan.Your Wedding Photographer Roadmap
| Step | What You’ll Learn | Done When… |
|---|---|---|
| Step 1: Decide If Wedding Photography Is Right for You | What the job really demands—and whether you’ll enjoy the people, pressure, and unpredictability that come with weddings. | You’ve tested the work in real life and can explain why it fits you. |
| Step 2: Learn the Wedding-Day Flow | What happens when, where pressure builds, and how to anticipate important moments before they happen. | You can walk through a typical wedding day from memory and explain what you should be preparing for next. |
| Step 3: Build the Core Skills Weddings Demand | How to work through changing light, fast timelines, movement, and the technical pressure of one-chance moments. | You can produce consistent results during preparation, ceremonies, portraits, and receptions. |
| Step 4: Learn to Direct People Without Making It Awkward | How to pose, prompt, and guide couples and groups without over-directing them or freezing under pressure. | You can run a repeatable posing flow and keep people comfortable while you do it. |
| Step 5: Build Real Wedding Experience Safely | How to progress from assisting to third shooting, second shooting, and eventually leading smaller weddings. | You’ve gained real wedding-day experience without taking on more responsibility than you’re ready for. |
| Step 6: Photograph Your First Wedding Without Panic | What to prepare before the wedding, what “ready” actually means, and how to stay calm when the timeline changes. | You’ve delivered complete coverage without missing the essential moments—and you know what to improve next. |

Step 1: Is Wedding Photography for You?
By the end of this section you should know (1) whether wedding photography fits you, and (2) what “becoming a wedding photographer” actually requires in real life.
When people think about becoming a wedding photographer, they usually mean one of two things:
- Can I actually do this? Do I have the personality, patience, and motivation?
- How do I get good enough? What should I learn first, and how do I build confidence without risking a couple’s day?
This guide answers both. But before we talk about skills, you need clarity on what the job is.
Wedding photography isn’t just photography. A lot of the job is people work.
You’re documenting one of the most emotional days in someone’s life. People are stressed, excited, overwhelmed, distracted, and sometimes dealing with complicated family dynamics.
That means the job requires more than technical skill. It requires calm leadership and the ability to work with people all day long.
And one more thing: becoming a wedding photographer isn’t about memorizing a million poses or buying expensive gear.
It’s about building reliability—the ability to photograph a fast-moving day, guide people without making it awkward, and deliver a complete story.
Three “Is It a Good Fit” Questions
Before committing to this path, ask yourself these questions honestly:
- Do you enjoy working with people? You’ll spend most of your time interacting with couples, families, and vendors—not just behind a camera.
- Can you stay calm under pressure? Weddings don’t pause so you can figure something out. The day keeps moving, and you have to keep moving with it.
- Do meaningful moments matter to you? Wedding photography is about documenting relationships and emotions, not just creating beautiful images.
If those ideas excite you more than they intimidate you, that’s a strong signal this path is a good fit.
Shy vs. Outgoing Photographers
Many people assume wedding photographers must be extremely outgoing.
That isn’t actually true. I’m naturally shy myself.
What matters is that you can step into a confident role when you’re working. Couples need someone who can guide them calmly and clearly during portraits and group photos.
If you’re shy, that simply means learning to switch into your “photographer mode” during a wedding day.
A Simple Way to Test Whether You’ll Enjoy Wedding Photography
If you’re unsure whether this path is right for you, try this low-risk experiment:
- Attend a friend’s event, party, or gathering and bring your camera.
- Focus on capturing interactions between people rather than staged portraits.
- Afterward, review the photos and ask yourself: did you enjoy watching for moments and reactions?
If the answer is yes, you’re already leaning toward the mindset that makes wedding photography rewarding.
Can You Become a Wedding Photographer With No Experience?
Yes, absolutely. Almost every wedding photographer starts with no wedding experience.
What matters is how you build skills before you take full responsibility for someone’s wedding day.
The best path is gradual: you increase responsibility as your confidence grows.
A realistic progression looks like this:
- practice portraits so you get comfortable directing people
- assist and second shoot to learn pace and timing
- start with smaller weddings when you’re close to delivery-ready
[Want my top tips based on over a decade shooting weddings? Here you go.]
How to Know You’re Ready for Step 2
You’re ready to move on when:
- You can say “yes, I want this” for specific reasons (not just because it sounds fun).
- You understand that the job is people + leadership as much as it is photography.
- You’re willing to learn the structure and rhythm of a wedding day so you can anticipate moments instead of chasing them.
If that sounds like you, the next step is understanding how a wedding day actually unfolds.

Step 2: Learn the Wedding-Day Flow
The Basic Shape of a Wedding Day
Most weddings follow a similar arc. The exact timing varies, but the structure usually looks something like this:| Part of the day | What usually happens | What photographers focus on |
|---|---|---|
| Getting ready | Hair, makeup, details, candid moments with friends and family | Storytelling, details, emotional anticipation |
| First look or pre-ceremony portraits | Couple sees each other or portraits happen before the ceremony | Natural reactions, relaxed portraits |
| Ceremony | Processional, vows, rings, first kiss | Key once-in-a-lifetime moments |
| Family and group photos | Formal portraits with family and wedding party | Organization and efficiency |
| Couple portraits | Dedicated time for the couple together | Guided posing and emotional connection |
| Reception | Entrances, speeches, dances, celebration | Energy, reactions, storytelling |
How Photographers Learn to Anticipate Moments
Understanding the structure is only the first step. The real skill is learning to anticipate moments before they happen. A few habits make this much easier:- Study real timelines. Look at how wedding days are scheduled and notice when important events typically happen.
- Watch how experienced photographers move. When assisting or second shooting, pay attention to where the lead photographer positions themselves before key moments.
- Mentally rehearse the day. Before a wedding, imagine the sequence of events so you already have a plan for where you’ll stand and what you’ll photograph.
Use a Timeline and Shot List as Training Wheels
When you’re still building experience, two simple tools make a huge difference: a timeline and a shot list. A timeline helps you understand the rhythm of the day so you know what’s coming next. A shot list helps you make sure you capture the essential moments while you’re still learning the flow. [Dive deeper: Learn more about wedding photography timeline]How to Know You’re Ready for Step 3
If these statements feel true for you, you’re ready to move on:- You understand the basic sequence of events in a typical wedding day.
- You can identify the key moments that absolutely must be captured.
- You’re starting to think about where you should be before a moment happens.
Step 3: Build the Core Skills That Matter at Weddings
The Four Skills That Make Wedding Photography Work
Over time you’ll build lots of abilities, but most wedding photographers rely on the same core set of skills:- Exposure in changing light including window light, shade, indoor lighting, mixed light.
- Focus and sharpness when people are moving.
- Composition under pressure for making quick decisions and clean frames.
- Editing consistency so a full wedding gallery feels cohesive
A Practical Way to Practice Wedding Photography
One of the fastest ways to improve is to practice in the environments that tend to stress beginners out the most. Instead of shooting random photos, try practicing in three situations that mirror real wedding conditions:- Bright or contrasty light—outdoors in sun or shade.
- Indoor window light—similar to getting-ready rooms.
- Low light with movement—the kind of lighting you see at receptions.
A Simple Two-Week Practice Plan
You don’t need to practice for hours every day. What matters is getting consistent real-world reps (i.e., real wedding practice).| Day | Focus | What to practice |
|---|---|---|
| Day 1 | Exposure | Photograph someone near a window, then in shade, then indoors. Aim for natural skin tones in each location. |
| Day 2 | Focus | Photograph someone walking toward you, turning, laughing, or hugging someone. Your goal is sharp eyes during movement. |
| Day 3 | Composition | Photograph small interactions and candid moments. Pay attention to backgrounds and framing. |
| Day 4 | Low light | Practice shooting in a dim room so you learn what settings work when light drops. |
| Day 5 | Editing | Edit 30–50 images so they feel like one consistent set. |
| Day 6 | Story sequence | Create a short “mini wedding”: details → portraits → candid moments → low light. |
| Day 7 | Review | Look at your weakest area and repeat that practice session. |
How to Tell If Your Skills Are Improving
You’re on the right track if you notice these things happening:- You can expose correctly in several lighting situations without guessing.
- You’re getting sharp photos even when people are moving.
- Your photos look cleaner because you’re noticing distracting backgrounds sooner.
- Your edited photos start to feel like they belong in the same gallery.
Use Good Education Resources When You Need Them
If you get stuck on a specific skill, it can help to learn from photographers who teach clearly. If you want clear fundamentals, these are solid starting points:- SLR Lounge—strong wedding-focused photography education
- AdoramaTV—solid explanations of lighting and camera fundamentals
- Fstoppers — useful lighting and technique tutorials
Practice the Hardest Wedding Environment First
For many beginners, the most challenging part of the day is the reception. Low light, fast movement, and constantly changing scenes can make things feel chaotic at first. But the more you practice in those conditions, the faster your confidence grows. [Dive deeper: Learn more about wedding reception photos]How to Know You’re Ready for Step 4
You’re ready to move on when:- You have a repeatable way to practice the skills weddings demand.
- You’re starting to feel comfortable shooting in different lighting situations.
- You can reliably get sharp, well-exposed photos of people interacting.

Step 4: Learn to Direct People Without Making It Awkward
The Two-Part Framework That Works Over and Over
You’ll get better results (and less awkwardness) when you lead in two phases:- Structure first: where to stand, what to do with hands, where to look.
- Then prompts: movement and interaction that brings out real expressions.
The 90-Second “Couple Portrait Loop”
When you’re new, it helps to have one repeatable loop you can run again and again. Here’s a simple loop that works in almost any location:- Place them. Put them close enough to feel connected (hips/shoulders near each other). Give them a clear starting position.
- Fix hands. Hands need something to do. Hold, touch, pocket, bouquet, jacket, waist—anything but dangling.
- Set the face direction. “Look at each other” is easier than “look at me.” Use it first.
- Get one clean frame. This is your safety shot.
- Add a simple prompt. One small movement: “Walk slowly toward me,” “foreheads together,” “tell each other what you’re most excited for.”
- Change one thing and repeat. Rotate them, swap sides, change distance, change your angle.
The One Rule That Saves Wedding Photos
If you take only one rule from this section, take this: Fix hands before you press the shutter. Hands are the fastest way a photo can look awkward, even if everything else is great.How to Practice Directing Without a Wedding
You don’t need a couple paying you to practice direction. You just need reps. A low-stress way to train:- Find two friends. Give them 20 minutes. Tell them you’re practicing direction, not doing a “perfect shoot.”
- Run the loop. Do the 90-second loop above 6 times in a row.
- Limit yourself. Only 2 prompts and only 3 “structure” starting positions. Constraints force clarity.
- Review one thing. Look for the pattern: where do photos start looking awkward? (It’s usually hands, posture, or spacing.)
A Quick Reset When Things Get Stiff
Sometimes a couple goes into “what do we do?” energy. When that happens, don’t talk more. Simplify.- Give them one easy action: “Hold hands and walk slowly.”
- Give them one easy focus: “Look at each other, not at the camera.”
- Give them one easy micro-direction: “Bring your foreheads close” or “pull in at the waist.”
Group Photos Are Leadership, Not Art
Group photos are where beginners lose time and confidence. The fix isn’t more creativity. The fix is a repeatable process you can run quickly:- Place people. Start with the couple, then build outward. Give everyone a “job” (hands, stance, spacing).
- Check faces. No one blocked. Eyes visible. Chins forward slightly if needed.
- Fix hands. Bouquets, pockets, holding, arms around shoulders—anything but dangling.
- Shoot fast. Get 3–5 clean frames, then move on.
Wedding Party Direction: Keep It Simple and Keep It Moving
Wedding party photos get fun when you lead them well. A reliable structure is:- One clean “everyone looks great” shot
- One interaction shot (walking, laughing, cheering)
- One quick variation (swap sides, change spacing, change angle)
More Reading
How to Know You’re Ready for Step 5
You’re ready to move on when:- You have a simple framework for directing couples (structure → prompt) that you can repeat.
- You can get a clean “safe shot” quickly, then layer in prompts for natural expressions.
- You can run group photos with a process instead of improvising.

Step 5: Build Real Experience Safely
By the end of this section you should have a safe, realistic progression for getting wedding experience (without taking full responsibility too early), plus a simple system to turn each rep into rapid improvement.
Weddings teach you faster than anything else because they combine pressure, speed, emotion, and responsibility.
But the goal is to get lots of experience early on, without risking a couple’s day while you’re still learning.
A good progression looks like this:
- Assist. Learn flow and logistics without being responsible for results.
- Third shoot. Practice coverage and storytelling support with low pressure.
- Second shoot. Own real moments under pressure, with clear expectations.
- Lead small weddings. Step into full responsibility with realistic conditions.
The Safe Reps Ladder: What You Do at Each Level
Here’s what “safe reps” actually means in practice:
| Level | Your job | What you should focus on | What you should not promise yet |
|---|---|---|---|
| Assist | Carry gear, manage lights, help wrangle people, watch how the day runs | Seeing the flow, learning where photographers stand, learning what matters | Deliverables, coverage responsibility, “I’ll get the shot” moments |
| Third shoot | Capture supporting coverage the lead can’t always get | Storytelling reps: candids, details, scene-setting, reaction shots | Owning key moments (vows, rings, kiss) unless assigned |
| Second shoot | Own assigned moments and deliver consistent, usable work | Ceremony angles, reactions, reception moments, low-light competence | Doing it “your way” if the lead has a system you’re supporting |
| Lead small weddings | You are responsible for the day, the timeline, and the coverage | Preparation, calm direction, must-capture coverage, staying ahead of the timeline | Overbooking yourself, taking complex weddings before you’re ready |
If you follow this ladder, you build competence without gambling on a couple’s wedding day.
How to Actually Get These Reps
Most beginners get stuck here because they assume opportunities will “appear.”
But usually, you have to create them.
A practical approach:
- Start with photographers whose work you genuinely respect. You’ll learn faster when the lead is organized and experienced.
- Reach out with clarity. Say what level you’re at and what you’re offering: assisting, third shooting, or backup support.
- Make it easy to say yes. Offer specific availability and a short portfolio or a small set of portrait work.
- Be reliable. Wedding photographers re-hire people who show up early, stay calm, and deliver what was asked.
When you’re new, your biggest advantage is professionalism.
You don’t have to be the best photographer in the room. You just have to be the easiest person to work with.
What to Shoot as a Third or Second Shooter
If you don’t know what to shoot, your rep becomes random. And random reps don’t build confidence.
A simple coverage focus that makes you valuable:
- Reactions. Parents, friends, and the people who matter to the couple.
- Story support. Hands, hugs, transitions, scene-setting frames.
- Alternate angles. Ceremony side angles, longer lens moments, wide context.
- Reception reality. Entrances, speeches, dance floor, low-light competence.
If the lead assigns you key moments, treat those as sacred.
Be early, know where you’ll stand, and don’t “wander” right before something important happens.
Styled Shoots: Use Them, But Don’t Let Them Fool You
Styled shoots can help you practice posing and build portfolio work, especially for couple portraits and details.
But they’re not a substitute for real wedding reps—because they usually remove the hardest parts: time pressure, unpredictable light, emotion, and pacing.
If you do styled shoots, make them more useful by adding constraints:
- Add a time limit. 12 minutes for portraits instead of an hour.
- Add imperfect light. Shoot in shade, mixed indoor light, or near sunset.
- Add transitions. Walk-and-talk prompts, moving from spot to spot.
- Add “must-capture” moments. A fake first look, a fake toast, a fake dance.
The goal is to train decision-making, not just create pretty frames.
[Dive deeper: Learn more about the different types of wedding photography styles.]
Turn Each Rep Into Rapid Improvement
After every wedding rep (even if you weren’t the lead), do this simple review.
This is how you go from “surviving weddings” to “leading them calmly.”
- Review the photos like a story. Does the set feel complete, or are there gaps?
- Name the weak spot. What stressed you out most? (Low light, time pressure, group photos, directing couples, missing reactions.)
- Practice one thing next. Not five. One.
Then schedule one practice session that targets that weak spot—so the next wedding is easier.
Two Lanes: What You Should Focus On Next
At this point, most photographers naturally fall into one of two lanes.
Lane A: You need more real-world experience.
Keep building safe experience and sharpening weak spots. These help you train the hardest parts of real weddings:
Lane B: You’re getting traction and you need the business roadmap.
If you’re starting to get inquiries (or you want to), it’s time to build pricing, booking, and marketing systems that work together—this guide is a good place to start.
How to Know You’re Ready for Step 6
You’re ready to move on when:
- You’ve done at least a few real reps (assist/third/second) and understand the wedding-day pace.
- You can reliably capture usable images in normal indoor light and reception conditions.
- You have a basic plan for how you’ll cover a wedding day (flow + must-capture moments).
- You know your current weak spot—and you’re actively training it.
Once you’ve built real reps safely, the next step is stepping into your first lead wedding with a plan—so you’re not relying on luck to stay calm.
Step 6: Shoot Your First Wedding Without Panic
By the end of this section you should know what “ready” really means, what to lock before the wedding, and how to run a simple day-of plan that keeps you calm while you cover the non-negotiables.
Your first wedding will probably make you nervous. That’s normal. It usually means you care.
The goal isn’t to be fearless. The goal is to have a plan strong enough that you can keep moving even when you feel the pressure.
What “Ready” Actually Means
You don’t need to be perfect. You need to be reliable.
A useful definition of “ready” is simple:
You can get consistent, usable photos all day. Even when the light changes and the timeline moves.
Ask yourself these questions:
- Can I get consistent exposure in changing light? Indoors, outdoors, shade, mixed light, backlight.
- Can I direct a couple into a few flattering positions quickly? Enough to get clean portraits without freezing up.
- Do I understand the wedding-day flow well enough to anticipate key moments? So I’m not reacting late.
- Do I have redundancy? Backup camera plan, extra batteries/cards, and a storage backup plan.
If you’re “yes” on most of these, you’re close enough to shoot your first wedding—especially if it’s a small wedding with clear expectations.
Choose a First Wedding Format That Sets You Up to Win
If you can choose your first lead wedding, choose one that matches your current skill level.
A safer first-lead format usually looks like:
- Micro wedding or elopement: fewer people, less chaos, more flexibility.
- Courthouse + portraits: short ceremony coverage and guided photos afterward.
- A wedding where you can bring support: even one experienced second shooter can reduce pressure a lot.
You’re not “less of a photographer” for taking a safer first step.
You’re building confidence without gambling on someone’s day.
Before the Wedding: Lock the Essentials
Most day-of stress comes from problems you could have solved in advance.
Instead of trying to plan everything, focus on locking the essentials.
| What to lock | What it prevents | What “done” looks like |
|---|---|---|
| Timeline | Constant guessing, missed moments, rushing | You know when and where the main moments happen, and you know your portrait window |
| Family formals list | Chaos, missing people, running over time | You have groupings written down in order and someone assigned to help gather people |
| Must-capture priorities | Forgetting essentials under pressure | You have a simple “non-negotiables” list you can check quickly |
| Gear redundancy | Panic when something fails | Extra batteries/cards, backup plan for camera/lens/flash, and a file backup plan |
| Vendor touchpoints | Feeling disconnected, missing cues | You know who the planner/DJ/officiant is and when key moments are being announced |
Want a confidence-building “am I prepared?” checklist? Here’s mine (it covers gear prep, things to do before the day of, and what to do on the wedding day).
The Three Lists That Keep You Calm All Day
When you’re nervous, your brain tries to do everything at once. That’s when people spiral.
The fix is to sort your coverage into three lists:
- Non-negotiables: moments you must capture no matter what.
- Nice-to-haves: details and creative ideas you’ll get if time allows.
- If-time: optional extras that never come at the cost of coverage.
Your job is to stay “covered” first. Creativity comes after you’re covered.
Day-Of: A Simple Playbook (In Order)
This is a calm, repeatable way to run the day. You can adapt it to any wedding.
- Arrive early and get settled. Take test frames, check exposure, confirm the light.
- Introduce yourself to vendors. Planner, DJ/band, officiant, coordinator. Ask one question: “Any changes to the timeline?”
- Start with easy wins. Details, room shots, candids. Build momentum.
- Before key moments, get in position early. Don’t arrive as something is starting. Arrive before it starts.
- During the ceremony, cover the anchors first. Entrances, vows, rings, first kiss, exit. Missing a detail is survivable. Missing rings or the kiss is not.
- During portraits, run your reliable loop. Don’t invent brilliance. Use your foundations, then add prompts for real expression.
- During reception, prioritize reactions. Speeches and dances are about faces and relationships as much as they’re about the couple.
If you feel yourself getting behind, return to one question:
What’s the next non-negotiable moment?
Then move toward it early.
When Something Goes Wrong, Use This Reset
Something will go wrong. Timelines drift. Light gets ugly. People disappear.
When you feel panic rising, do this:
- Slow down your body. One deep breath. Loosen your shoulders. Check your stance.
- Get covered. Capture the safe frame first.
- Make one adjustment. Move your position, change your lens, fix your exposure, or change your angle. One change at a time.
That keeps you moving without getting stuck.
After the Wedding: Do This Immediately
Two things before you do anything else:
- Back up your files. Two locations. No exceptions.
- Write three notes. What went well, what was hardest, what you’ll practice next.
This is how you turn your first wedding into fast growth.
How to Know You’ve Completed This Step
You’ve “passed” Step 6 when:
- You delivered complete coverage of a real wedding day without missing the essentials.
- You stayed calm enough to keep making decisions under pressure.
- You can name your current weak spot and you have a plan to train it before the next wedding.
Congratulations!
Once you can shoot one wedding without panic, you’re not a beginner anymore.
You’re now a working wedding photographer.
The Next Step: Turn These Skills Into a Wedding Photography Business
Learning to photograph weddings and building a wedding photography business are connected, but they’re not the same thing.
Everything in this guide is about capability: becoming the kind of photographer who can deliver calmly and consistently.
Once you’re close to that point, the next step is learning the business side: how to get inquiries, book clients, price sustainably, and build a repeatable system.
If you’re ready for that roadmap, check out our guide on how to start a wedding photography business.
Becoming a Wedding Photographer Takes Time—But It’s Learnable
If this guide feels like a lot, that’s normal. Weddings combine technical photography, storytelling, directing people, and live-event pressure all at once.
But it’s learnable. And you don’t have to learn it all at once.
Start with the roadmap. Practice deliberately. Get safe reps. Improve one thing at a time.
Over time, something shifts. You stop reacting to the day and start anticipating it. You stop worrying about settings and start focusing on people, emotion, and story.
And that’s the moment you realize you’re no longer just learning wedding photography.
You’ve actually become a wedding photographer.
Case Study: My Journey to Becoming a Wedding Photographer
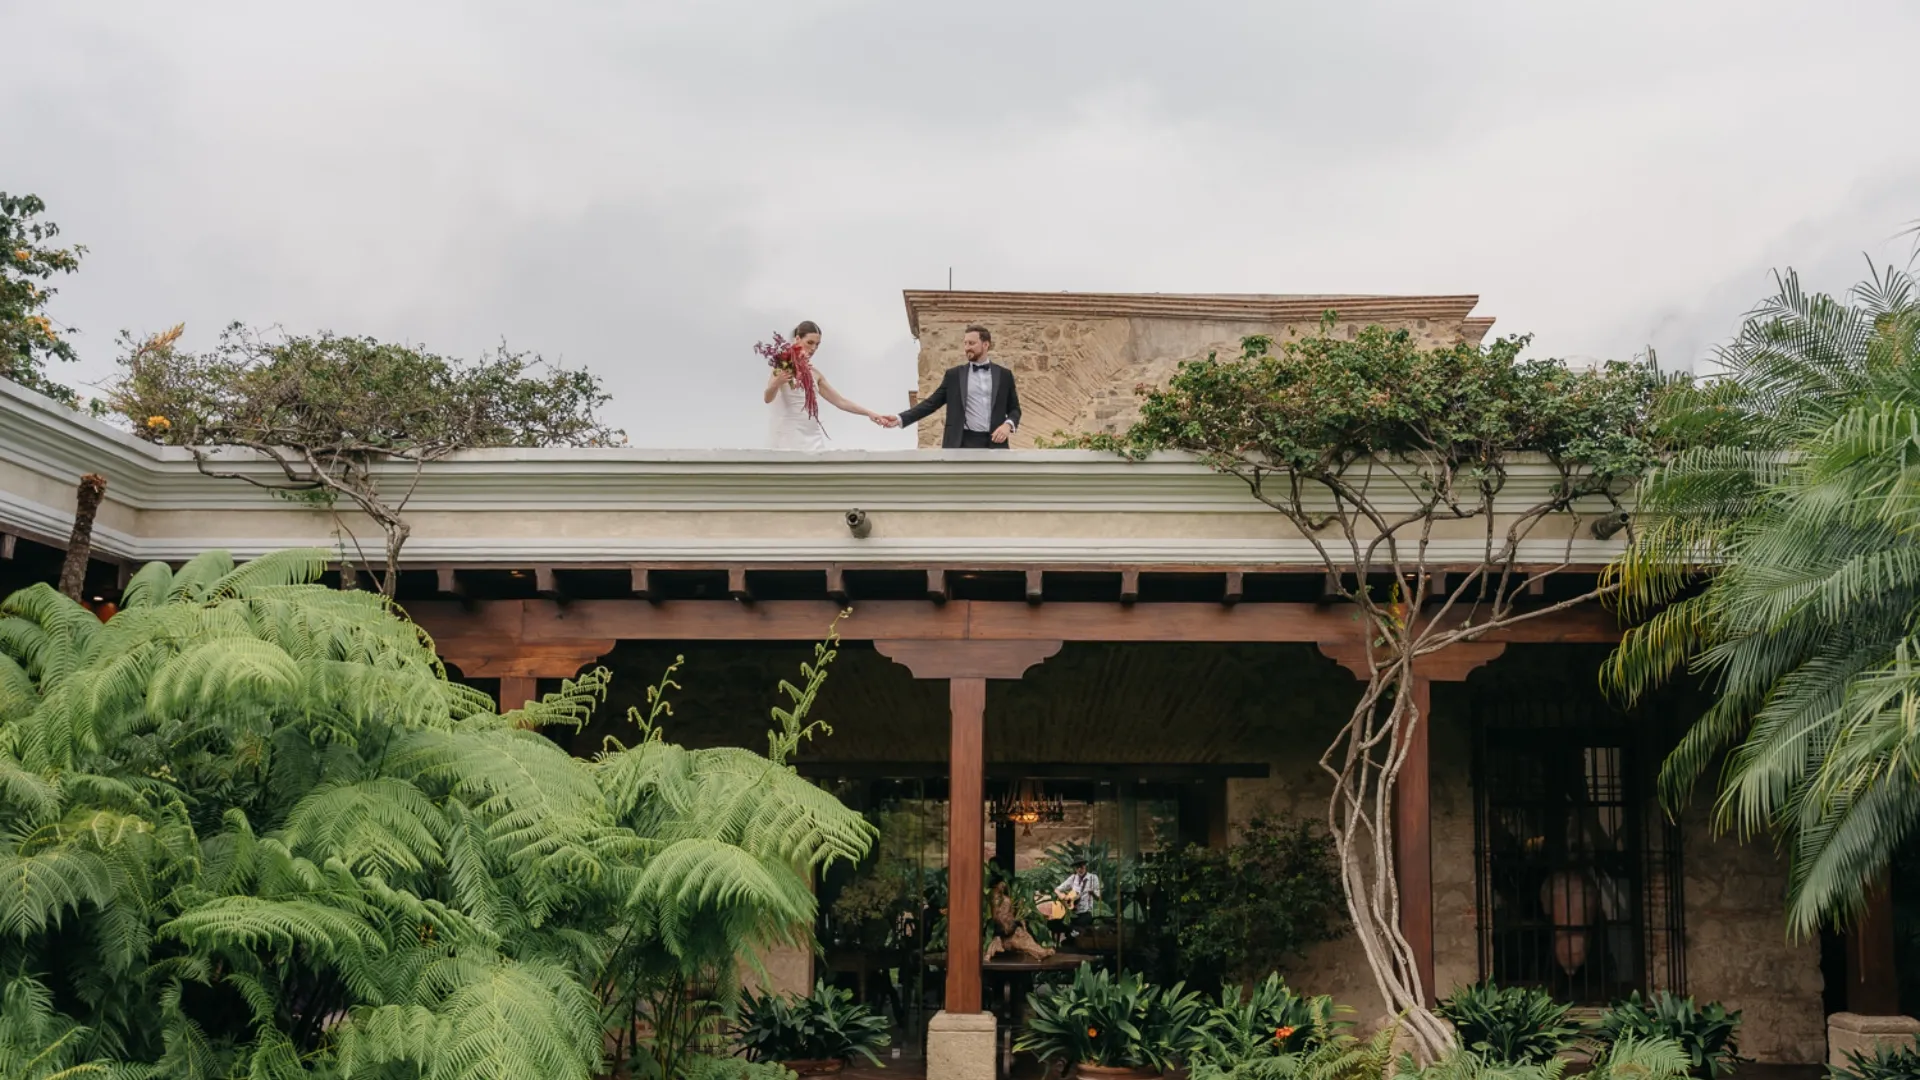
Right now, I’m one of the leading wedding photography businesses in Guatemala. My wife and I run the business together. We’ve won multiple awards and we’re usually booked a year in advance or more. And when you search “Guatemala wedding photographer” we’re one of the first results you’ll find.
But when I first got started I didn’t know anything about running a business, and I didn’t know anything about wedding photography.
How I Got Started in Photography
When I first started doing photography, I took pictures of everything I came across.
My brother loved capturing sunsets and long-exposure night photos in southern Spain. I started doing landscape photography with him, joining him on long “photo-trips,” and along the way he taught me how to use a camera.
(Side note: Landscapes are a great way to learn the exposure triangle comprising aperture, shutter speed and ISO.)
My passion and interest for photography continued and I began to focus on documenting my life and travels, putting together personal projects with a social focus—one about the people I encountered during the time I lived in Brazil and another about a giant-kite festival in Guatemala.

But I didn’t grow up thinking I would become a wedding photographer.
For a long time photography was just something I enjoyed. I liked observing people and capturing moments, but I didn’t imagine it becoming my career.
That changed when I moved to Guatemala.
Guatemala is an incredibly beautiful country, and living there changed the way I saw photography. The light, the landscapes, the people—it made me want to photograph more seriously.
Around that time, my partner Mishka and I started experimenting with photography together. We practiced constantly, photographing friends and learning as we went.
We did a fake wedding shoot on Lake Atitlán, where we were living, and posted the pictures online.
I used the alt text “wedding photographer guatemala” for one of the photos and someone found us on Google—and that became our first wedding client.

That first wedding was small and informal. It wasn’t a luxury event with a huge budget and perfect timeline.
At first, I felt what most new wedding photographers feel: excitement mixed with a lot of responsibility.
A wedding is different because the moments matter so much. You can redo a portrait session if something goes wrong. But you can’t redo a ceremony.
That responsibility pushed me to improve fast.
Every wedding taught me something: how fast the day moves, how important it is to anticipate moments, and how much couples depend on their photographer to guide them calmly through portraits and group photos.
Over time, the nervous energy I felt in the beginning turned into confidence—not because every wedding went perfectly, but because I learned how to handle the unpredictable parts of the day.
And that’s the real lesson from my story:
You don’t have to start as an expert.
You become a wedding photographer by practicing, taking safe reps, learning from each wedding, and getting a little better every time.
Want to see my work? Check out my wedding photography here on my website.
FAQ: Becoming a Wedding Photographer
Can I become a wedding photographer with no experience?
Yes. Almost every wedding photographer starts with zero wedding experience.
The key is building competence gradually: practice portraits, then assist/third shoot/second shoot, then lead small weddings when you’re close to delivery-ready. Step 5 in this guide lays out a safe progression so you don’t take full responsibility too early.
How long does it take to become confident shooting weddings?
It depends on how often you get real wedding experience, but most photographers start feeling noticeably more confident after several real weddings (as an assistant, third shooter, or second shooter) plus deliberate practice between them.
Confidence comes fastest when you review each wedding, identify one weak spot, and train that one thing before the next wedding.
What skills matter most for wedding photography?
The biggest “make or break” skills are the ones that hold up under pressure: exposure in changing light, focus on moving people, clean composition, and editing consistency.
Step 3 includes a simple practice plan you can repeat until those skills feel reliable.
What’s the best way to learn the wedding-day flow?
Start by learning the basic arc (prep → ceremony → family formals → couple portraits → reception), then study real timelines so you understand what happens when and where moments tend to occur.
These are helpful training wheels while you’re learning:
How do I direct couples without making it awkward?
Use a repeatable structure: place them, fix hands, set face direction, get one clean “safe shot,” then add a simple prompt (movement or interaction) to bring out real expression.
These guides help a lot if directing is your weak spot:
What should I do first: styled shoots or second shooting?
Second shooting is usually the fastest path to real wedding readiness because it teaches pace, pressure, timing, and problem-solving in real conditions.
Styled shoots can be useful for portraits and details, but they often remove the hardest parts of weddings (time pressure, unpredictable light, emotion, and transitions). If you do styled shoots, add constraints so they feel more like real wedding conditions.
Do I need expensive gear to start wedding photography?
You don’t need the most expensive gear—you need reliable gear and a backup plan.
For your first weddings, redundancy matters more than upgrades: extra batteries, extra cards, and a plan for what you’ll do if something fails.
What’s the hardest part of wedding photography for most beginners?
Usually one of these: directing people, low-light reception work, or staying ahead of the timeline.
If receptions are the stress point, train that environment directly instead of avoiding it:
How do I know I’m ready to shoot my first wedding?
You’re ready when you can reliably get usable photos all day (not perfect—reliable) and you have a simple plan for flow + must-capture moments + backups.
If you want a confidence-building prep list:
What should I do immediately after my first wedding?
Back up your files to two locations first, then write a few notes on what went well, what was hardest, and what you’ll practice next.
This turns your first wedding into a fast learning jump instead of a one-off experience.


 Español